
 Forum Home
Lace Front Newbie Information Thread


Rather you realize this are not american lf vendors are purchasing from chinese vendors...and its very easy for you to have this information so that you can purchase lf's and bypass the middle man and spend less money than buying from an american vendor..the american vendors DO NOT venilate their own wigs but the chinese do, that's why they order from them just like you can.. all you need to do is learn about measuring and densities and how to take care of the units.. but this is a list of chinese vendors that make lf wigs and they are reliable vendors:
Here's the vendor contact information that ladies can purchase lf.
CHINESE VENDORS
KevinCN:
Ribzhangcn@yahoo.com.cn or kevincn0532@yahoo.com.cn
Tel: +86 532 85718620Fax: +86 532 85721780
Rib Zhang General Manager
QINGDAO FREEDE INDUSTRY&TRADING CO., LTD
Kevin Yan: kevinfreedelee (3 order minimum)
Qingdao Hioh Hair Products Co., Ltd.
Mr Kevin Yan
Unit One, No.20,
Tel: 0086 532 83675381
<ST1:COUNTRY-REGIoN>


Now where's the rest of your crew girl??
LACE UNIT HAIR COMPOUND AND MANUFACTURER
CUSTOM FULL LACE MEASUREMENTS
For Full Lace Wigs

Now where's the rest of your crew girl?? [/QUOTE]

That's right Sexi, that's YOUR work and no one else have the rights to it.

THE RIT'S DYE DIP which can be used for either bumping up the bleach knots when a lf is dyed with clothing dye, or removing the clothing dye from the hair..
most of the time when you get them black colors its clothing dye.. i would probably do the rit's dye remover DIP, b/c it can jump start the process without over bleaching the knots..b/c you can keep doing it and then burn them knots out and then all the hair falls out.. so remember that in the future.. but i mircowave the water hot for about 2 min, then add about a tablespoon or two to a bowl of hot water and DIP IT IN AND OUT.. don't soak it b/c i think its like cooking hair, and i'm just not down with that b/c of the damage it could cause to the hair shaft.. and that's what they instructions say, but no! i dip in and out and you can see the color rinsing out with each dip.. then when the water temp goes down, then i would maybe soak for only a very limited amount of time like a 1 or 2 min.. then remove and condition.. then you can do the loreal super blonde lightening kit it will kick them knots up and you'lll be done with it.. but DON'T brush too hard with a small brush b/c you can push the dye thru the holes and dye the roots.. so brush lightly over the area, and leave it for about 1 5 to 20 min and rinse and condition again.. SEAL THEM KNOTS AFTERWARDS.. When using this method the just bump up the knots and removing the clothing dye for knots only, turn the cap inside out and just dip the cap in a bowl of this mixtures.. for removing the clothing dye from the hair, dip the entire unit in the mixture and you will get the benefit of both the hair color and the knots.. deep condition and proceed to either air dye the hair, or proceed with bleaching the knots..
With the loreal super blonde kit it comes with the blue powder mix and a tube of the blonde lightener, to ensure that you don't color the lace or get the residue of orange from the blonde tude, use just a little of that and more of the blue powder, the lotion and a little bit of the blonde tube ligtener just for thickening up the mixture, but less is better b/c the blue powder and lotion an get the job done.. watch it but i've found that at least 20 minutes will lighten the knots with this combination, altho the instructions will say 30 min. and i've done that as well..
turn the unit inside out on a mannequin or styrofoam head like this:
mix powder bleach and 30 vol developer
use a highlighting brush to brush the solution on the inside of the cap directly over the knots. Not a lot just a little, you want it to touch the roots of the unit a little as possible.
the processing time depends on the color... how tight the knots are... if they have been sealed etc... you'll just need to watch it. If the hair is black you want the knots brown.... if the hair is brown the knots should be a light brown... usually light colors like blonde don't need bleached knots...
if the hair has highligted hair ventilated in i usually try not to get the bleach on the highlighted areas at first. wait a few mins then put some on those spots...
unless the highlights are really light like blond then it doesn't need it.
when the knots are a desired color wash it out... and reseal the knots.
if you're scared you'll leave it too long. do it twice... when im working on someone else's unit i usually do in in two stages...
i hope that makes sense.
Rules
1.) Color can not lift color!! This means hair that has been colored before can not be colored again. In order to change the color of this hair, the previous color must be removed ( bleached) out and then It can be colored again.
2.) Bleach and Haircolor are not one in the same! Haircolor lifts and deposits color into the hair. It must be left on the entire time indicated by the color brand and will stop working if left on longer. Leaving haircolor on longer then intented can result in a darker then desired result as the lifting process has ened and all that is left is the deposit.
Bleach lifts the color from hair in stages (black, to brown, to red, to orange, to yellow, to pale yellow.) Unless it drys, bleach will not stop working until you stop it. This is why it is so easy to damage hair or get uneven results. You have to work quickly. The spot were you first applyed the bleach will continue to lighten as you work through the rest of the hair.
3.) The color on the box is almost never the color you hair will come out to be! When you pick out a swatch at the salon, that is almost never the color we use. That only lets us know the color that you would like your hair to be and then we mix the color according to what your hair will need to get there. The color your hair is, your natural color and the underlying color in your hair all contribute to what the end result will be. This alone could be a whole nother 2 page thread so the most I can tell you is dark hair ( anything from a 1 to a 4) will always pull red or brassy tones when going lighter. Knowing that it would be wise to use a color with the words cool, ash or natual on the box to nutralize the redish or brassy undertones.
4.) If color has been removed to go lighter, it must be put back in to go darker! If you ordered a platinum blonde stock with the idea you can always color it darker, you have to take into consideration that the hair had been lightened first. If you want to take that 27 down to a 1 you have to put back in all the colors that have been removed first. To get to blonde you have to go remove black, then brown, then red, then orange to to yellow (blonde) So to get back to black, you need to put back in orange, red and brown. This is called filling. You can do this with a semi permanant color and you can use a shade that had words like redish copper brown. Apply the filler color first and then color with the shade you were trying to achive. This is very important. Im sure we all have that blonde haired friend who bought the black rinse and ended up with green hair
5.) When in doubt, call a profesional! If you dont know what your doing, just dont do it! I know you ladies have paid too much money to have to thow away your lfs due to experimtel color mishaps! This isent even half the color chapter but it is a start. I have given you the basics so please use them wisely.
Helpful hints
Cigerette ashes mixed with a littel water will take the color stains right off your skin.
When bleaching a whole head, use a lower volume in the back and a higher volume on the top to give yourself more room for error.
Reds fade the quickest but yet are the hardest to get rid of. Think twice before going red. Dont do it if you will want to go blond later or want a lasting color that you wont need to refresh after a few shampoos.
Use semi or demi permanate color when going darker as to put the least amonunt of stress on the hair and preserve the life of your unit.
Types of haircolor
Permanent: This color lifts the natural color and deposits in the desired color. Must be mixed with proxide devloper in desired strenth (volume) to acheve desired degree of lighting. Does not wash out although it can experiance fading. Best for lighting virgin hair
Demi Permanent: Depost only, no lift. Must be mixed with one strength non proxide devloper. As fade resistant as permanent color but will fade out gradually. Best for toneing, filling, coloring hair darker, refreshing faded color or making a color more vibrent. can not make hair lighter.
semi permanent/ rinse : no mix, no lift color. Ready to use right out the bottle. Fades out completly. Best for filling, toning, going darker and temporary color changes.
Baking Soda
You do a BS bath the same way you do a BA bath, with the exception of this:
Fill a large 3qt container with hot water. Pour 1/2 to 3/4 cups of baking soda into the water and mix until completely dissolved.
After brushing out the unit, place it into the mixture making sure it is completely submerged.
allow the unit to soak over night or a minimum of 4 hours. (The hair will begin to float to the top of the mixture.) Remove it and rinse with warm water.
Wash with a clarifying shampoo thoroughly. Deep condition , rinse and allow to dry.
Style as usual.
The baking soda bath is NOT for conditioning the hair; it is used to remove styling and conditioning product build-up.
It is also extremely important to rinse out the baking soda solution prior to shampooing because if you leave it in and the hair dries, it will feel "chalky" and stiff, but this is only because you didn't rinse the unit thoroughly. Once you have done the baking soda bath, then use a clairfying shampoo and do a deep conditioning and the hair should be soft and silky. Keep in mind, too, that if you don't thoroughly rinse out shampoo, the hair will stiffen up when it's dried.
HOW TO DYE A LF:
seal your knots
i use vaseline all the time as a light coating, this ensures you don't not only dye the knots but you also must protect the lace so it won't get colored as well.. I use a cream base like loreal so it doesn't run onto the lace, plus it has a root applicator.. you can always use goo gone to spray up in there b4 you wash it removes all the vaseline..
and step by step instructions on cleaning a lf:
a video and a step by step:
video http://www.hairdirect.com/video/how-to/hairline-cleaning.aspx?=button
written instructions
http://www.hairdirect.com/resources/maintenance/lacefront-hairline.aspx?=button
Invisi Bond Application Back Hair line
http://youtube.com/watch?v=rcT0RJhPW8g (Step 1)
http://youtube.com/watch?v=T6RzssWbfAM (Step 2)
Invisi Bond Application Front Hairline
http://youtube.com/watch?v=OKcB3VYu9ps (Step 1)
http://youtube.com/watch?v=zRXCX2x99HU (Step 2)
http://youtube.com/watch?v=7kO8S4I9w8g (Step 3)
how to apply your unit:
http://www.youtube.com/watch?v=tVv0AfJQzQU&NR
MORE VENDORS:
COMPANY NAME: QINGDAO BEAUTY WIGS CO., LTD
TEL: 0086-532-83813430 FAX: 0086-532-83813430
EMAIL: ada7773@hotmail.com
CONTACT PERSON: MS. ADA HAN
WEBSITE: http://www.beautywigs.com
Cool! and Thanks! I just got a quote from Qingdao Fulide, also known as the company Qingdao Freede. I say this because its the same contact info. as the Qingdao Fulide you just mentioned....This is the Original Kevin by the way ladies! I contacted the kevincn0532@yahoo.com.cn address. Here are some other names that belong to this company: Peng Zhang....Bin Yan...Rib Zhang.
Tel:+86-532-85718620
Fax:+86-532-85721780
COMPANY NAME: QINGDAO WINHEALTH INTERNATIONAL CO., LTD
TEL: 0086-532-88653200 FAX: 0086-532-82100050
EMAIL: wigs@qdwinhealth.com
CONTACT PERSON: BING ZHANG
WEBSITE: http://www.qdwinhealth.com
I have an order out with Qingdao Freede Industry &Trading Co.,Ltd
Tel:+86-532-85718620
Fax:+86-532-85721780
SUNWAY HUMAN HAIR WIG
TELE: 0086-530-5386898 FAX: 0086-530-5332556
EMAIL: sunwayhair@gmail.com
CONTACT PERSON: ECHO
WEBSITE: www.peonytrading.com
ADHESIVES AND TAPES:
http://store.adventhair.com/pebo.html
| Secure Silicon Adhesive | Extended Wear Adhesives formulated for bonding Hairpieces and Wigs to skin up to 6 weeks. |
| Extended Wear Adhesives formulated for bonding Hairpieces and Wigs to skin up to 6 weeks. | |
| Extended Wear Adhesives formulated for bonding Hairpieces and Wigs to skin up to 6 weeks. | |
| Extended Wear Adhesives formulated for bonding Hairpieces and Wigs to skin up to 6 weeks. | |
| Extended Wear Adhesives formulated for bonding Hairpieces and Wigs to skin up to 6 weeks. |
|
| |
| Extended Wear Adhesives formulated for bonding Hairpieces and Wigs to skin up to 10 days. | |
| Toupee Tape and Adhesive touch up. | |
sexibeach
Senior Member
Joined: Mar 15, 2006
Location: United States
Posted: Mar 09, 2008 at 9:54am
A Step-by-step for Detangling Your Hair System: http://www.youtube.com/watch?v=PYx_HQVyxXg http://www.youtube.com/watch?v=dEKEMBp9xCI Mirror Slide for Hair Systems from The http://www.youtube.com/watch?v=PdiCp43WLM0 Cleaning the Front Hairline of your Hair Replacement System : sexibeach
Senior Member
Joined: Mar 15, 2006
Location: United States
Posted: Mar 09, 2008 at 9:54am
When Removing my Lf:
i put my alcohol that is 99% or 91%, and goo gone as my remover in two spray bottles that helps with everythang.. especially when my hands get sticky i spray them off. i also use both to spray on my lace to clean off the glue when removing, and it makes it pretty much roll off and use a soft toothbrush to remove the glue.. when i remove my unit and do my hair treatment and let my hair air dry over night, i use A & D Zinc Oxide cream on my skin where my unit is usually applied to keep my skin healthy and not chapped from wearing my unit it heals anything overnight.. http://site.denovohair.com/images/Making-a-Head-Template.pdf When applying my Lf:
this is what i do to apply my lf...i apply one layer of Mr. C's in the front and the back around the circumference, first let it dry for 2 minutes, then i apply a coat of the mity tite .. (sometimes while i'm waiting i got my unit prep with the tape on the unit at the nape and sides to apply once i get all the glue on, lately i've not needed any tape..) then after a coat of base bond or Oil Resistant White Glue (ORWG www.coolpiece.com ) dries until its clear, which only takes a minutes, i apply the base bond or ORWG as the final and last glue..
(i make my wig cap out of sheer nylon stockings, while my glue is getting tacky i apply the wig cap infront of my natural hairline on the skin of my forehead, b/c it has to look like continual skin meeting skin.. i take a couple of small pieces of tape and apply to the sides in front of my hairline edges and that way the cap can stick to the tape on the sides.. then i take and apply another thin coat of basebond in front the wig cap b/c thats where i'm going to place the hairline of the unit..every thing goes in front of my natural hairline, first the wig cap and then the units is placed in front of the wig cap.. ) now i just use the Sally Hansen Spray and not the Wig Cap.
then i pin the baby hairs back with hair clips, apply the front of the unit first around my face area, tie it down with the back clipped upwards not to touch the nape of my neck with tape still in the paper on the back of the tape b/c i'm not ready to apply it yet..then i wait about 5 min. tied down..while i'm waiting for the front that's tied down to dry some, i apply a coat of ORWG to the nape on top of the Mity Tite, and let that dry for that 3 min period while the front is tied down.. once i remove my scaf then i start to peel off the paper from the back tapes, b/c now the Mr. C's and ORWG at the nape is dry, then i can pull down the back and stick it to the tape and the glue is holding like heeck.. tie the whole circumference of my hairline down once again, wait another 20 to 30 minutes and then i'm all set to go.. my application time is less than 10 min.. in the beginning it takes a while to learn and sometimes hours to apply but take your time you'll learn and get it perfected with each application..
sexibeach
Senior Member
Joined: Mar 15, 2006
Location: United States
Posted: Mar 10, 2008 at 9:54am
PREPARE YOUR SCALP BEFORE ATTACHING YOUR WIG:
It is important that your scalp stay clean and free of oily buildup while you're wearing a hair system. This way, your scalp stays healthy and there is less chance of an oder problem, caused by perspiration, while you are wearing the unit.
Before you put your hair system on, cleanse your scalp using an astringent of approximately 70%-75% isopropyl alcohol. This should cleanse the pores and eliminate oil and perspiration.
If you use tape or a liquid adhesive to atach your unit, it can irritate your scalp over a prolonged period of time. I recommend using a product by Smith + Nephew called Skin Prep which will protect your skin from irritation caused by the adhesives. By applying it to your skin first, it forms an invisible barrier between your skin and the tape or adhesive. This way all of the pull stress is on the barrier, and not your scalp.
If you experience any irritation or prolonged redness even while using Skin Prep, you should try using a different adhesive or attachment method to prevent infection
USING FOUNDATION TAPE IN CONJUNCTION WITH NORMAL TAPE ATTACHMENT:
When using tape to attach your hair system, the foundation material has to absorb a lot of stress each time you pull the tape off and reapply it. Over time, this can cause the material to tear and the knots of the hair to unravel.
By using foundation tape you can protect the foundation materiel from excessive stress. Here's how it works:
You start by cleaning your tape patch areas with isopropyl alcohol to remove any oil or residue. Then you apply a strip of foundation tape to the patch area. This foundation tape stays on the unit for a month or more of constant wear. Your regular double-sided tape is applied on top of the layer of foundation tape. This way, each time you change your tape through the normal course of wear, the stress of changing it is put on the foundation tape and not the foundation material or tape patch. It also prevents tape residue from building up in the knots of the hair.
TIP: To keep the foundation attached through shampooing and longer wear, apply a smal piece of lace front support tape under it. This will keep the foundation tape secure even longer.
ATTACHING OUR WIG USING A DOUBLE-SIDED TAPE:
There are several different types of double-sided tape on the market today, but they really boil down to three types.
1) Standard double-sided transparent
2) Red Liner (used for bonding and extended situations)
3) Blue Liner (Lace Front Support tape)
The following are a few tips on how to use each type of tape. The applicaton for each is more or less the same, but each type has its advantages and disadvantages, so think carefully about which type of tape is best for your lifestyle.
STANDARD DOUBLE-SIDED TRANSPARENT TAPE:
To use the standard transparent tape, always start by first using foundation tape as mentioned earlier. Standard transparent tape only lasts about three days, so it will be changed often. This will put a lot of stress on the foundation material if you don't use foundation tape. Once you have the foundation tape in place, now you can appiet he double-sided tape and position the unit on your head.
Special tips: Once you press the tape down onto your scalp it will be difficult to reposition the unit. To alleviate this problem, just slightly dampen your scalp with water wherever the tape will make contact. This will give you a few seconds to adjust the position of the unit on your head before the tape starts to stick.
After putting the foundation tape o the base material apply the double-sided tape to the patch areas. It will be easier to apply if you remove only one side of the tape backing until after the tape is in place.
RED LINER TAPE:
Red Liner tape is most commonly used for bonding a unit ffor extended wear. It is applied around the perimeter of the unit and a liquid bonding adhesive is then applied on top of the tape to bond the unit to your head. There are many types of bonding adhesives out there, and most of them are better left to the professionals. You should only bond your unit if yourself if you completely understand the process and have worn a bonded hair replacement system before.
Red Liner Tape can also be used by itself to attach your unit. It is stronger than standard transparent tape, and will usually last about one week before it needs to be changed.
BLUE LINER (LACE FRONT SUPPORT TAPE):
Lace front support tape is the strongest double-sided tape available for wigs and hair pieces. It can easily be recognized by the blue backing and the words "lace front support tape" printed on the opposite side. The tape itself is transparent like the others.
This tape will generally last about two weeks before it needs to be replaced, and it will stick to any type of foundation material.
Lace front support tape can be used on all lace foundations but should only be used in specific areas where, such as the temples and the hairline. These are the areas where it is most important that the lace lay perfectly flat against your skin. Small pieces of tape the size of a postage stamp are all that is needed. Position the tape around the front and back hairline and on the temples.
Special Tips: To remove the hair system when using lace front support tape, dab 99% alcohol at the hairline while slowly peeliong back the lace. As the lace begins to lift, dab the alcohol under the tape so that it releases from your scvalp but stays attached to the lace. If you use alcohol, you will notice that once the alcohol evaporates, the lace front support tape will reactive and be sticky again.
When positioning your hairsystem wet your fingertips to prevent the tape from sticking to them as you lay down the front lace.
REMOVING OLD TAPE BEFORE CLEANING:
Before shampooing your hair system, you should remove all of the tape and residue from the lace of your hair system. This is expecially important when you use lace front support tape.
Start by applying Adhesive Release or 99% isopropyl alcohol to all areas of the unit where the tape is applied. The best way to do this is by using a sponge tip swab, swabbing through the top of the lace onto the tape. It should only tape a minute or two for the tape to release its grip so that you can pull it away.
At the hairline, you should be extra careful, so the best method is to soak the front portion of the hair system in a shallow dish of adhesive release for 15 minutes. After that the tape should come right off.
If using an adhesive release other than alcohol be sure to flush out the lace with alcohol once you've removed the unit. This will eliminate the oily residue left by the release liquid. If you don't flush it out the tape won't stick when it is time to put your unit back on.
ATTACHING A HAIR SYSTEM USING CLIPS: If you only have partial hair loss or if your hair has begun to grow back, tape may not be a practical method of attachment for you. In such cases, comb (wig) clips are an option. These are small clips that clip into your existing hair and snap shut to hold the wig in place.
Once you have clipped in your hair system, you should not feel the clip pulling your hair. If you feel it pulling, open the clip and snap it shut again. The clip is meant to bite the hair, not pull it tight.
Special Tip:
1) Every three months you should have your clips repositioned slightly so that they are not constantly putting stress on the same areas.
HOW TO POSITION YOUR WIG TO LOOK MOST NATURAL:
Keeping your unit properly positioned on your head each day is key. Here is a way to make sure the unit is positioned correctly on your head each time you put it on:
In order to determin how far back or forward it should be positioned on your head, always use the first four fingers of your hand as a guide. Place them against your forehead with your little finger right at your brow line. The hairline of the wig should touch the edge of your index finger.
For wilgs, it will be easy to tell if the wig needs to be adjusted to the right or left by placing one finger at the bottom of the sideburns of the wig once you've put it on. When you look in a mirror your fingers should be directly across from one another. If not, adjust the wig accordingly.
As a final check, place the first three fingers of your hand on your temples with your little finger at the corner of your eye. The hairline of the wig should be equal distance from the corner of your eye on both sides, and your three fingers will should whether to adjust it further.
USING LACE FRONT ADHESIVES: If your wig has a lace front hairline, you can use a liquid adhesive to attach the lace to the skin. Liquid adhesives work better than tape n a lace front, because they make the lace lay completely flat against your scalp. Different adhesives react differently when applied to a person's skin and you should never continue to use a liquid adhesive that causes prolonged irritation to your scalp.
To properly apply a liquid adhesive to your lace front, first make sure that the wig or hair system is properly positioned on your head. Starting in the center of your hairline, gently lift the lace and apply a thin coating of the adhesive to your scalp front the front of the hairline to about an inch back. WOrk your way along the hairline in both directions until the entire hairline has a thin layer of glue under it.
Never press the lace down into the glue with your fingers. This will cause the hair to get matted up in the adhesive and it will look unnatural. Instead use the teeth of a wide toothed comb and press the lace flat against your scalp. Make sure that there are no ripples or edges of the lace sticking up when you're finished, and dab a little adhesive on those areas where neccessary.
REMOVING YOUR HAIR SYSTEM:
Using a cotton pad or sponge tip, dab 99% alcohol (or Adhesive Release) at the hairline while slowly peeling back the lace. As the lace begins to lift dab the alcohol under the lace so that it releases from your scalp.
CLEANING YOUR HAIR SYSTEM:
Always remember that the best way to clean your hair system is while it is off your head. When you wear a bonded hair system you will have to shower with it on but you should be extremely gentle, as this is not the ideal way to clean the unit.
The irst thing you need to do is remove all the tape or glue residue from the foundation. After a period of time it gets embedded in the lace and must be removed before you can shampoo the hair. Simply soak the lace areas where there is residue in a shallow dish filled with Adhesive Release or 99% alcohol for approximately 15 minutes. If you use adhesive release be sure to flush the lace with alcohol after soaking it.
SHAMPOOING A HUMAN HAIR WIG OR HAIR SYSTEM:
1) Using a rinse sprayer like you might have in your shower or at your kitchen sink, rinse the hair from about an inch away from the knot in the direction of the hair towards the ends and in the same direction the hair falls. Do this with cold water to avoid getting the foundation of the wig or the knots wet, which causes them to unravel and the hair to fall out more quickly.
2) Pin the wig to a wig head, pinning it all the way around the base so that it will keep its shape while drying.
Taking 1/2" thick sections about 3" wide between your fingers apply shampoo to the hair working from 1" above the knot and work the shampoo towards the ends of the hair. Do this until all the hair is shampoo. ONLY USE A SHAMPOO DESIGNED FOR COLOR-TREATED HAIR AND DILUTE IT WITH WATER.
3) Let the shampoo sit for no more than 60 seconds and repeat the rinse process being careful to remove all the shampoo.
4) Once all the shampoo is rinsed out, blot the excess water away from the hair with a towel.
5) Lightly wipe the inside of the base of the wig with a towel and then again with a sponge or cloth soaked in 99% alcohol. The alcohol will draw out any excess water or shampoo that has reached the knots, allowing them to dry quickly.
6) Put the wig on your head while it is still wet, making sure that the hairline is the width of the four fingers from the top of your eyebrows and that the temples are approximately three fingers' width from the corner of your eyes. Then slowly comb through the hair starting at tha ends and working towards the roots. Comb and style as you normally would. These steps will insure your wig will come out as you desire without any surprises. It is easiest to part the hair while it is wet to get the desired look.
WHEN THE HAIR SYSTEM IS NOT BEING WORN:
Always keep the wig or hair system pinned to a canvas block and/or wig head when not in use in order to maintain its shape. Make sure the block is the same size as the wig. If too small or too large it can cause the foundation material to stretch and the unit will start to fit improperly on your own head over time.
STYLING TIP:
To get the hair at the hairline to lay back, use a 1/2" strip of cardboard pinned on top of the back front while the hair is wet and allow the hair system to dry overnight. When the cardboard is removed you will see that it is much easier to style the hair back away from your hair line. sexibeach
Senior Member
Joined: Mar 15, 2006
Location: United States
Posted: Mar 10, 2008 at 9:54am
this is a post i did b/c of too much product build up and its helpful for your natural hair to be able to hold moisture while wearing these units.. so:
there are many clarifying shampoo's on the market in the drugs store i even think suave has one that's very inexpensive.. with the ACV i use it straight on my natural hair, my momma use to use it as a rise when i was growing up... some dilute it with water.. i use 1/2 cup and pour it on massage it in and rise it out, and the secret is to rise it with cool water b/c it seals the cuticles...no shampooing afterwards..
the ACV is really deeper than you think for your own hair care, b/c it restores the porosity which is the measure of the hair's ability to absorb moisture...this is determined by the condition of the hair's cuticle layer (the overlapping scales of the hair shaft), and is rated as low, normal, and high. In normal, healthy hair, the cuticle is compact and inhibits the penetration of the hair shaft by moisture both moisture going in, and moisture coming out...when the cuticle is overly compact and prevents the penetration of the hair by moisture it has low porosity..to determine the porosity of your hair, simply feel it both when wet and when dry...if the hair feels straw like and rough when dry, or if it feels gummy or slightly rubbery when wet, then you probably have a problem with overly porous hair... if your hair is taking days to airdry. then your hair is good...No...it's Great, that means it's in really good condition....think of a sponge with holes in it...these holes would be called pores..when the sponge is fresh and new, it is able to absorb a good amount of water and hold the moisture inside very well..as the sponge ages, the pores (holes) become distorted, widen, and lose shape...these changes make the sponge super absorbent, yet less able hold the moisture it once could...the older sponge is said to be more porous or have greater porosity than the new sponge..
porous means that your your cuticles are raised, allowing more product to enter...cuticles raised is a bad thing, it makes your hair tangly, it makes your hair frizzy.. and it makes your hair act badly..hair mats up like dog fur when it's like this...what I read is that your hair's PH balance is out of wack, i think your hair becoming more acid, therefore raising the cuticle. Porosity control by Roux is a Ph balancing conditioner.... so anyone at any point can use it if their hair's Ph goes off, just by using daily styling products...even shampoo will throw your hair's Ph off...anyway...if your hair holds water, and dries evenly hours later, your hair is in great condition...my hair is now soaking up water and holding it like a sponge and that's what we really need wearing these units for weeks at a time.. i use porosity control conditioner by roux and they have a shampoo as well you can find at the BSS... you could use these products on both the unit and your natural hair.. after my AVC rise i use the porosity control conditioner so i dont' smell like vinger..lol we need to be able to keep our hair and the units hair moist, for our natural hair the only way to obtain length and stop breakage is by being able to keep our hair moist so its very important... my journey is really for my natural hair treatments, and thinking of the lf's along the way.. when i posted about the silicon mix, its not in replacement of the bleach bath.. altho i'm still testing.. but the hair on the lf's need moisture more than anything thing else in the world, b/c its no longer attached to a human follicle to receive the natural oils that come from a follicle.. that's why when it gets dried up its a problem, and the hair can break too, not to mention the tangling issues we have with the lf hair too.. and the silicon mix is the da bomb and does improve the hair greatly, one of the ingredients in the silicon mix is Ceramide which is very important, it is produced in human hair..
i started looking into the products for this particular ingredient b/c its produced in human hair.. so its very much needed to keep the hair in great condition..
Ceramide is a lipid (fat) found naturally in the hair. It is what keeps the hair shiny, strong and healthy.
I am not sure how it is produced by the body, but I would imagine that since lf hair is not attached to the body and cannot be replenished of lost proteins, vitamins and lipids, a good Ceramide treatment would bring the hair right back to life.
All hair types (curly, straight, wavy, and coarse) can benefit from their hair process. Due to the history of the Dominican Republic the population is pretty much mixed. Some are white like their European ancestors while others resemble their African antecedents. Then there are many that have mixed traits such as coarse hair and light skin or dark skinned with curly/wavy hair. This means that the products are fabricated maintaining everyone in mind.
So with that in mind, they have a few product b/c of the science and what human hair produces while attached to a follicle, i think would be great for the lf's one in particular is called Kan Kanechomn Ceramidas
The ceramids are the main lipides of the capillary structure, acting as a basis between the cuticle and the cortex, offering to the hair threads more resistance against external aggressions including frequent wash. The Capillary Renewer with Ceramids Kan Kanechomn has a formulation with a special combination of ingredients, giving your hair a complete restoring treatment for the damaged hair threads, offering conditioning, softness and nutrition to the hair. http://store.sickbay.biz/kankacedecoc.html
This product promotes hydration, conditioning and malleability to the hair giving back the natural oil to the hair threads and recuperating the shine, softness and vitality. Directions: Upon washing your hair, apply this product with a smooth massage during 2 minutes. Then rinse the hair taking the excess off. In case of a bath cream, cover your hair with a tepid towel for 30 minutes. Using a thermal cap let the cream ... This product was elaborated with medulla and silicone and acts as an hydrating cream forming a protecting pellicle, reducing the hair electrostatic load besides nourishing and regenerating granting smoothness, shine and softness to the crisp hair. Directions: Upon washing your hair, apply this product with a smooth massage during 2 minutes. Then rinse the hair taking the excess off. In case of a bath cream, cover your hair with a tepid I think its the science of what a lf needs that will work well with either of these products to mix with the silicon mix. and of course b/c i have a little product junkie problems i've ordered everything and lots of other stuff i've not even posted about..lol
Silicon Intense Treatment Mix is restoring old lf units and maybe removing the need for the bleach bath or as a preventive measure to avoid tangling units. I am working on finding a comparable product that will work with the silicon mix or just for lf's so that we can have a long life span with proper care of the hair. I recommend this additional treatment when doing the bleach bath to give a deep conditioning.. it can be used as a monthly treatment, but be sure to rinse a very long time to be sure to get all the conditioner out of the hair..
 charron08
Newbie
Joined: Mar 01, 2008
Location:
Posted: Mar 10, 2008 at 9:54am
Wow thanks sexi!..that was very helpful. Especially the part about the silicone mix !..thanks girl!
 Koffee Brown
Junior Member
Joined: Mar 10, 2005
Location:
Posted: Mar 12, 2008 at 9:54am
Dayummm.. The Sexi-ONE in da house dropping knowledge. Get your pens and pads ladies and start taking notes lol. Or for 2008-- get to copying/pasting in Word docs. LOL.
Thanks for sharing SexiBeach! Koffee Brown
Junior Member
Joined: Mar 10, 2005
Location:
Posted: Mar 12, 2008 at 9:54am
Hey! Charron!
sexibeach
Senior Member
Joined: Mar 15, 2006
Location: United States
Posted: Mar 12, 2008 at 9:54am
TWO ADDITIONAL VENDORS: Name:CHUNHAI DIAO
email: info@goldenwigs.com
website: www.goldenwigs.com - slow site but he is good with email
Holly zhang
sexibeach
Senior Member
Joined: Mar 15, 2006
Location: United States
Posted: Mar 12, 2008 at 9:54am
i found two new products...i've found some steri strips which is what i used when i had my full tummy tuck, yes i have a flat tummy LOL but they have improved them since then.. they are now called Steri-Strip S surgical skin closure.. i thought it thru brought some and put it in the part of my chinese virgin remy.. i will post pictures tomorrow to show you, its very realistic.. the down fall is they have skin tone, but it won't match everybody's skin tone unfortunately.. maybe they will make darker colors but they have clear, or you might be able to utilize them by blotting some bare minerals makeup on top the skin tone colors to make it match your skin tone..
i added a little Mr. C's on the sticky side of the steri strip so that it will stick to the lace, and it looks like scalp, its extremely thin and has a little fuzzy side on the back so it won't stick to your hair once you place it in the cap.. and it stayed in place and then i put it back on the wig head.. i only placed it close to the edge and left the lace remaining where i knew i was on to adhere the lace to my natural skin so it will blend.. here's some information on the steri strips and what they are used for.. also i found some dry powder shampoo that sprays powder that can not only assist in dulling the shine on the virgin units, but also clean it at the same time and not harm the hair..
3M announces the addition of the Steri-Strip S surgical skin closure, a primary wound closure device, to its family of skin and wound care products. The Steri-Strip S surgical skin closure is a non-invasive, adhesive-based wound closure device designed to treat low-tension lacerations and surgical incisions painlessly and without the use of needles. Faster and easier to apply than sutures, the Steri-Strip S surgical skin closure is designed to provide a time-saving option for surgeons and other medical specialists.
This innovative technology creates a new skin closure option with multiple benefits, including minimizing scarring, which is important to many patients who undergo various surgical procedures each year," said Craig DiLorenzo, business director of 3M Skin Health. "We are pleased to introduce the Steri-Strip S surgical skin closure as part of our ongoing dedication to providing dependable, easy-to-use, skin-friendly solutions to the health care community."
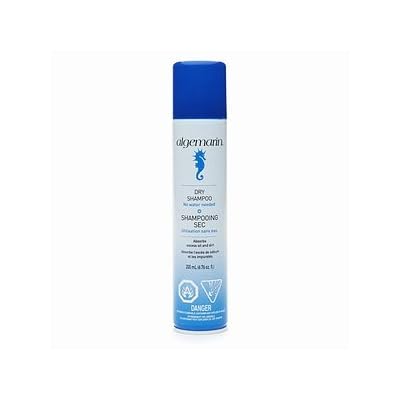
The Steri-Strip S surgical skin closure is simple for clinicians to apply quickly and is available in assorted sizes to accommodate various wounds. In addition to a primary wound closure, it also can be used with suture or staple closures, or as reinforcement for wounds after early suture or staple removal. The device is constructed of soft polyurethane pads and interlaced polyester filaments to provide strong, secure skin closure on most any length of wound. The Steri-Strip S surgical skin closure can be worn for up to seven to 10 days, during which patients can take brief showers without any additional covering. The Steri-Strip S surgical skin closure, formerly distributed as ClozeX wound closures, was added to the 3M line of skin closure products in April 2006. A variety of surgeons and physicians in different medical specialties have already experienced the dependable outcomes associated with the Steri-Strip S surgical skin closure after surgery. These health care professionals include physicians specializing in plastic and reconstructive, cardiothoracic, vascular, OB-GYN, general, orthopedic, dermatologic, and emergency surgeries.  here's the dry powder shampoo:
Algemarin Shampoo "Dry-Powder Spray"
 oh yea forgot to say if your knots are bleached, the grid completely disappears, you don't see it anymore... UPDATE: here are the pictures, i must say this works, the skin tone color is a little bit loud, but i found using the bare minerals blotting in the part did tone it down.. i did use Mr. C's to apply the strip to make sure it sticks to the lace, the strip is a blunt cut on the end, so i clipped it with pinking shears to have a zig zag end.. at the end of the zig zag and where the lace was left out, i used the bare minerals to make it blend together so you can't see where it starts are ends period.. for my dark skins sista's i'm going to keep thinking this thru, i do think that the darker powder makeup will work but you'll probably need to add this as soon as you apply the strip to the unit, while its still sticky.. b/c its applies sticky side up, in order for the powder to stay stuck.. altho i still want to think it thru to perfect it for them.. altho if your willing to do your own experimenting i would suggest that you buy one pack of skin tone and one of clear and get to work...however this is working the grids are gone.. so i'm pretty satisfied for the first try, but you know me i'll keep thinking of ways to make sure it never fails for all of us..
http://public.fotki.com/sexibeach/lace-fronts/3m-steri-strip-s-su/3m-steri-strip-s-su/ no password but you must be signed in to view
 I mean you can experiment for what suits you, but i found that once i brush the Mr. C's adhesive on the strip i immediately apply it to the unit the grid disappears then.. then place it on the wig head.. i think for the more brown complexion its important immediately once its pinned back on the wig to begin to blot with the darker powder makeup and it will change the color.. i did test last night with the darkest powder i have which is tan, and did it that way.. i blotted as soon as the mr. c's was applied and was wet tackyness and the powder stuck and changed the color of the skin tone strip. this is the darkest powder i have, so it not really a dark shade, but it did change it.. once you do the first blotting when its in a tacky wet stage after applying to the lace and then the wig head.. then once you do you actual application, you should be able to add more if needed..
 MsMahoganyRed
Newbie
Joined: Mar 05, 2008
Location:
Posted: Mar 13, 2008 at 9:54am
Work it Sexi!! You are so helpful!!
Those strips are tha bizness!!!
ladyk
Newbie
Joined: Mar 13, 2008
Location:
Posted: Mar 13, 2008 at 9:54am
Can you use the strips at the nape with Mr.C's adhesive?

New On HairBoutique.com
Copyright 1997-2025, hairboutique.com All Rights Reserved.
Copyright 1997-2025, hairboutique.com
All Rights Reserved
| |